


How To Bleach Knots On Wig: A Comprehensive Guide
Wigs are now a necessary accessory for people who want to switch up their hairstyle without making a permanent change. However, a common problem with wigs is that the knots on the lace can be visible, making the wig look less realistic.
What Does Bleaching the Knots on a Wig Mean?
Bleaching the knots involves applying a mixture of hair bleach and developer to the knots, lightening their color. The goal is to make the knots less conspicuous by matching them more closely to the color of the wearer's scalp. This process effectively reduces the contrast between the knots and the scalp, creating a more natural and undetectable hairline.
Why Should We Bleach Knots on Our Lace Front Wigs?

Bleaching knots on lace front wigs is essential to create a natural appearance by making the knots, which secure each hair strand to the wig's lace, less visible. This technique enhances the wig's realism, helps achieve an undetectable hairline, and boosts confidence by making the wig look like natural hair growing from the scalp.
Do You Wash Your Wig Before Bleaching Knots?
It is not necessary to wash the wig before bleaching the knots because you will have to wash the hair after you bleach the knots to make sure all the chemicals are out of the lace.
There are three reasons you will not need to wash the wig before bleaching the knots:
-
The Chemicals that are being used to bleach the knots must be washed out thoroughly because if not it will damage the lace, damage the hair, and damage your know hair and scalp.
-
Washing the wig before bleaching the knots will weaken the lace.
-
When you wash a wig, it must air-dry and that can take hours or even days and you must make sure the hair is fully dried before trying to bleach the knots on the lace. If the hair is not fully dried and you are applying the bleach to the lace it can make the bleach runny and it will get on the root of the hair of the wig.
Difference Between Bleached Knots and Unbleached Knots
The primary difference between bleached knots and unbleached knots on a lace front wig lies in their visibility and overall appearance:
-
Bleached Knots:
- Visibility: After the knots are bleached, they become much less visible. The dark dots at the base of each hair strand are lightened to match the wearer's scalp or skin tone, making them blend in seamlessly.
- Realism: Bleached knots create a more natural and realistic appearance. The wig's hairline and parting area appear as if the hair is growing directly from the scalp, and the wig is less likely to be detected as artificial.
- Styling Versatility: A wig with bleached knots offers greater styling versatility because the hairline and parting look more authentic. It can be worn in various styles, including updos, without revealing the wig's construction.
- Photography and Video: Bleached knots are less noticeable in photos and videos, reducing the risk of the wig appearing artificial, especially in well-lit or high-definition settings.
-
Unbleached Knots:
- Visibility: Unbleached knots are typically dark and noticeable. They contrast with the wearer's scalp, which can make the wig look less natural and more like a wig.
- Realism: Wigs with unbleached knots may look less realistic because the knots are clearly visible at the base of the hair strands. This can be a drawback when aiming for a natural appearance.
- Styling Limitations: Wigs with unbleached knots may have limitations in terms of styling, especially when it comes to creating a natural-looking hairline or parting.
- Photography and Video: Unbleached knots are more likely to be visible in photos and videos, potentially affecting the overall appearance of the wig in media.
Thankfully, here's a detailed step-by-step guide on how to bleach knots on a wig for a more natural look:
Materials You'll Need:
-
Bleaching Powder: Use a high-quality hair bleaching powder.
-
Developer: Choose a 20 or 30 volume developer.
-
Mixing Bowl: For mixing the bleach.
-
Applicator Brush: To apply the bleach.
-
Gloves: To protect your hands.
-
Foils or Plastic Wrap: For covering the wig during processing.
-
Tinting Brush or Applicator Brush: For precise application.
-
Neutralizing Shampoo: To stop the bleaching process.
-
Conditioner: To restore moisture to the hair.
-
Tweezers (optional): For knot customization.
Step-by-Step Guide:

-
Prepare Your Workspace:
- Work in a well-ventilated area with good lighting. Cover your workspace with old newspapers or a disposable tablecloth to catch any spills.
-
Put on Gloves:
- Always wear disposable gloves to protect your hands.
-
Mix the Bleach:
- Follow the manufacturer's instructions to mix the bleaching powder and developer in a mixing bowl. Aim for a creamy consistency that's easy to work with.
-
Strand Test:
- Before applying the bleach to the entire wig, do a strand test. Take a small section of hair near the nape of the wig, apply the bleach, and time how long it takes for the hair to reach your desired level of lightness. This will help you determine the processing time for the entire wig.
-
Section the Wig:
- Use hair clips to divide the wig into manageable sections. This will ensure that you can bleach the knots evenly.
-
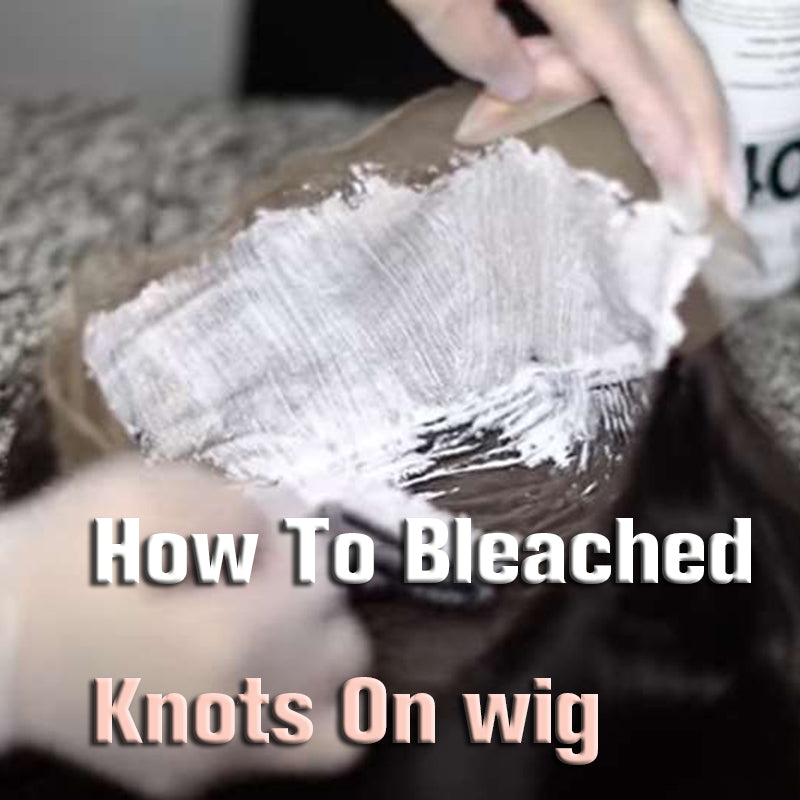
Apply the Bleach:
- Start with one section at a time. Using an applicator brush, apply the bleach mixture directly to the lace in the area where the knots are located. Be careful not to get bleach on the hair itself. Ensure that all knots are thoroughly saturated.
-
Cover with Foil or Plastic Wrap:
- After applying the bleach, cover the section with foil or plastic wrap. This helps trap heat and allows the bleach to process more effectively.
-
Monitor Processing Time:
- Check the wig regularly to monitor the bleaching process. The processing time can vary depending on the wig's hair type and color. It usually ranges from 20 to 45 minutes. Refer to your strand test to determine when the knots have lightened to your desired shade.
-
Rinse with Cool Water:
- Once the knots have lightened to your liking, remove the foil or plastic wrap. Rinse the section thoroughly with cool water to stop the bleaching process. Gently pat dry with a towel, being careful not to rub or tangle the hair.
-
Neutralize with Shampoo:
- Wash the wig using a neutralizing shampoo to remove any residual bleach. Rinse thoroughly.
-
Condition the Hair:
- Apply a good quality conditioner to the wig to restore moisture and keep the hair soft and manageable. Leave it on for a few minutes, then rinse.
-
Air Dry:
- Place the wig on a wig stand or mannequin head to air dry. Avoid using heat styling tools on the wig while it's wet.
-
Customize Knots (Optional):
- After bleaching, you can further customize the knots by plucking them with tweezers to make them appear even more natural. This step is optional but can enhance the wig's realism.
Remember that bleaching knots is a skill that may require practice to achieve the desired results. Take your time, follow safety precautions, and always perform a strand test before proceeding with the entire wig. With careful application and proper aftercare, your wig will look more natural and realistic.
What Should I Do While Over-Bleached a Lace Front Wig?

We all make mistakes; some people make the mixture too runny or thin which will leak onto the hair, some people press too hard while dabbing the bleach on the lace which will make the bleach leak, but these are easy fixes. There are two options to fix this issue on the more temporary side and one on the permanent side.
-
A temporary fix will be to use your mascara and brush it gently on the roots of the bleached hair, then air-dry or blow-dry.
-
A permanent fix will be to dye the roots of the color of the wig. You will need to get a bowl, a brush, small wand-like mascara, or a little spoolie. Follow the instructions on how to mix the color thoroughly. Take the mascara like a wand and apply the dye to the hair. Make sure you do not push too hard because you can accidentally dye the knots back darker or black. Let the dye sit on the hair for about 25 minutes. Rinse the dye out and then wash with shampoo to make sure that you do not leave any dye on the root. Condition the hair and let it sit for 5 minutes and then rinse out.
Important Tips When Bleaching Knots (avoid breaking the lace)
To avoid breaking the lace while bleaching knots on a lace front wig:
- Use a gentle bleach designed for hair or wigs.
- Choose a lower-volume developer (20-30 volume).
- Perform a strand test first.
- Protect lace with petroleum jelly or lace protector.
- Apply bleach precisely to knots only.
- Monitor processing time closely.
- Rinse promptly when knots reach the desired lightness.
- Use a neutralizing shampoo.
- Air dry the wig.
- Handle lace gently, especially when wet.
- Minimize frequent bleaching to preserve lace quality.
Tags:
Previous
How To Make Your Wig Look Real And Natural?
Next
Pre-Bleached invisible Tiny Knots: SIMIDOLA New Updated Wear & Go Wigs
Related articles

Wigs Recommendation for Summer Vacation
Jul 17 2024


Why You Must Try Simidola New M-Cap Wear Go Wig
Jan 19 2024


How To Care Wig in Cold Weather
Dec 19 2023

Why Should We Try Bleached Knots Wig?
Dec 19 2023